Image courtesy of Scryfall.com
Sideboard Strategies with Slagwurm Armor
In the sprawling sandbox of MTG sideboards, some tools shine brightest when you know exactly what you’re tuning for. Slagwurm Armor—an artifact Equipment from a classic Mirrodin era pairing—offers a surprisingly practical punch as a situational answer in the right matchups. It’s a modest one-mana investment that quietly scales into a reliable late-game shield, making it a thoughtful inclusion in post-board game plans. 🧙♂️🔥💎
The strategic rationale behind folding Slagwurm Armor into the sideboard
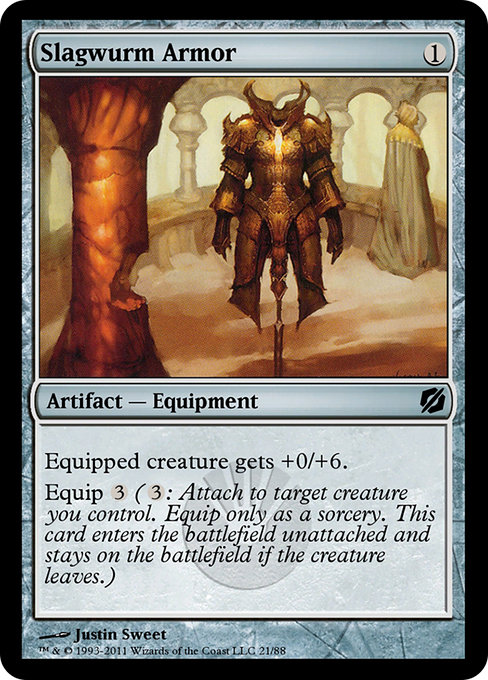
Slagwurm Armor arrives as a colorless, creature-targeted boost with a simple but powerful line of text: Equipped creature gets +0/+6. Equip {3} (Attach to target creature you control. Equip only as a sorcery. This card enters unattached and stays on the battlefield if the creature leaves.) It’s a rare blend of accessibility and resilience that resonates with players who appreciate the quiet art of tempo and attrition. For a card costing just {1}, the payoff is not flashy, but it’s dependable—especially when you’re staring down a swarm of aggressive creatures that threaten to push past blocking power. The armor’s +6 toughness upgrade can turn a marginal block into a lasting stalemate, preserving your board presence while you draw into answers. And because the equipment enters unattached, it won’t suddenly vanish the moment your blocker dies; it lingers on the battlefield, ready to be reattached to another creature when the moment is right. ✨
In a meta flavored by artifact-heavy strategies from Mirrodin’s sandbox and early Phyrexian incursions, this card finds a home as a defensive pivot. It’s not about turning a 1/1 into a battle beacon; it’s about giving a crucial blocker the staying power to soak two, three, or more trades, buying you crucial turns to pivot into removal, card advantage, or a bigger threat. The fact that Slagwurm Armor is colorless and relatively low-profile makes it a quiet, opportunistic pick in the sideboard rather than a centerpiece in your game plan. 🧙♂️
Best targets and timing for the shield
Choosing the right target is key. The ideal recipient is a creature that either already serves as a reliable blocker or a key engine piece you don’t want to lose to a single alpha strike. Look for creatures with solid base toughness, a defensive role in your deck, or those that become unblockable or problematic for your opponent once they’re buffered to stay alive. A +0/+6 boost on a sturdy 3/3 or 2/4 blocker can swing a match by preventing early break-throughs and forcing suboptimal trades for your opponent.
Timing matters just as much as target selection. Since you can equip only as a sorcery, you’ll want to plan for post-combat situations on your own terms—ideally after you’ve stabilized the early threats and your hand has a few removal spells or follow-up threats. Bringing Slagwurm Armor in on the heels of a successful trade or on a favorable board state helps you lock in a longer, grindier game where you can outlast your opponent’s removal suite. In a pinch, you can also lend the armor to a second blocker if the first one proves too valuable to lose. The equipment’s ability to stay on the battlefield if the creature leaves adds a layer of redundancy—your army won’t suddenly collapse when a single blocker bites the dust. ⚔️
Matchups and how Slagwurm Armor shifts the balance
Against aggressive starts, Slagwurm Armor can be a quiet game-changer. The extra toughness helps your blockers survive two-for-ones that would otherwise break you open early, allowing you to stabilize and reach your sideboard plans. In midrange tap-outs, the armor buys you time to deploy a bigger threat or secure a favorable trade window. Against control decks, it’s less about beating down and more about dragging the game into the late stage where your incremental security translates into card advantage and inevitability.
Remember that this is a pure sideboard tool, not a front-line ace. Its value compounds when your opponent cannot easily answer a stubborn, well-protected blocker and you can weave in additional disruption or card draw to seal the game—without overcommitting on the battlefield. In long grindy matchups, that extra couple of turns can be the difference between stalling and winning. And as with many Mirrodin-era designs, there’s a certain nostalgia to sticking with a plan that relies on sturdy, straightforward tech rather than the flashier, more fragile options. 🎲
Deckbuilding tips to maximize its value
- Include 0-2 copies in the sideboard if your meta features a lot of aggro or midrange with efficient early threats.
- Pair Slagwurm Armor with creatures that have solid base stats and multiple tap- or trigger-based removal threats to maintain momentum after combat.
- Keep a backup plan: ensure you have a few removal spells or a bigger finisher to push through once the blockers survive the initial brunt of the attack.
- Remember the sorcery-speed equip limitation. Plan your sideboard recs around post-swing timing rather than instant-speed shenanigans—you’re not looking to surprise with an instant-sudden buff, but to stabilize and outlast.
- Consider the colorless nature of the card in your artifact-heavy build. It remains a low-necessity add-on that doesn’t require color-specific support, staying relevant in broader Mirrodin-flavored or artifact-focused shells. 🔧
On a lore level, Slagwurm Armor hails from a era when Mirrodin’s metallic heartbeat pounded against the Phyrexian nightmare—the fragile line between invention and invasion. The card’s text reflects a design philosophy that prizes reliability and durability: a simple, sturdy shield that lets you endure the storm and push back with measured, strategic blows. That ethos translates well into sideboard play: it’s not the loudest card in the lineup, but it’s precisely the kind of dependable tool that wins games when the stakes are highest. 🎨
For fans who enjoy weaving emblematic cards into sideboard strategies, Slagwurm Armor remains a welcome nod to the old-school craft of planning ahead and preserving your board state long enough to see the endgame unfold. It’s a reminder that strength sometimes comes from staying power, not just raw speed. If you’re curious to explore more about artifact synergy, or you’re hunting for a desk accent that sparks conversation as you sleeve up, check out the featured product below and keep the conversation going with your own sideboard stories. 🧙♂️🪄
Pro-tip: If you’re curious how this kind of card design has influenced modern equipment mechanics, you can read more from our network below. And if you’re shopping for a bit of MTG-inspired flair for your desk or play space, we’ve got you covered.